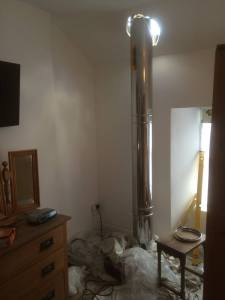
This flue runs up through your house and exits through your roof.
The twin wall flue must pass through the ceilings and roof. If the flue passes through bedrooms it should be “boxed in” with an inspection hatch situated in a specific place. In the loft, it will likely need some type of mesh protection. Specialised fire-stop plates, finishing plates and supports will also be used along the way. As the flue penetrates the roof, a flashing kit will be used to ensure it is watertight.
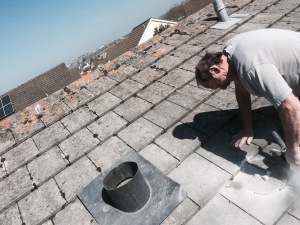
As with all twin wall flue systems, the terminal point of the flue will be dictated by building regulations, your roof and any obstacles close to your property.
Flexi-Twin wall flue system
Another type of installation we perform involves both the flexible flue liner and also the twin wall internal flue system. This flue system normally occurs when your chimney stops within the attic or loft space. The original chimney has been capped and the roof adjusted to cover it up. This may be because the chimney was previously unsafe or damaged and was taken down below the roof level.
You will have an existing fireplace (you may or may not require fireplace remodelling), so a stove can be installed using a flexible flue liner as stated above. However within the loft the flue will be converted to the twin wall flue system that will then penetrate the roof space and terminate externally.
Twin wall internal installations – the Blazing way
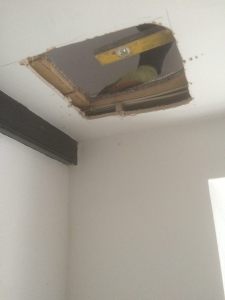
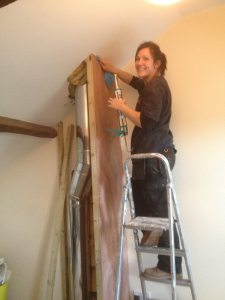
We will take measurements so that we can make a hole in the ceiling where the twin wall flue will pass through. We will start tentatively investigating as we go along to ensure there are no nasty surprises awaiting us – such as electrical wires and wooden joists. If we encounter any obstacles we will inform you immediately so that a plan can be made and implemented. For example if the flue has to use this path and electrical wires are obstructing it and cannot be moved, we will call an electrician to rectify the situation. This will be charged to the customer, as this is an unforeseen circumstance. This situation rarely happens.
Eventually a hole in the ceiling will be made that is wide enough to allow the flue to pass through with a 50mm air gap surrounding it.

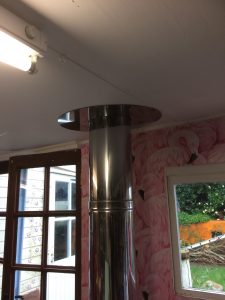
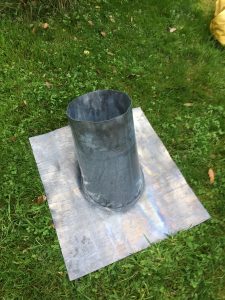
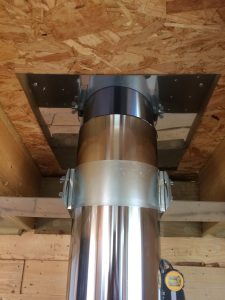
Depending on what ceiling and what type of property you have, a plate will be used encircling the flue and covering up the hole we have created. This plate will either be a ventilated fire-stop or a finishing plate. There are plates available for every roof pitch.
If the flue passes through a first floor, it must be boxed in. You could choose to do this if you wanted under our guidance. We typically do this with plaster-board and then skim it to make good. An inspection hatch will also be fitted that will be about midway on the boxing on one side.

Supports will be used to take the weight of the flue. Typically this will be placed across the joists.
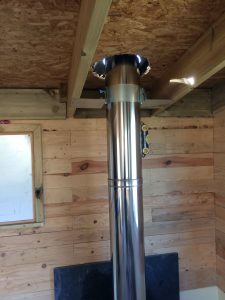
In the loft area, other supports will be used to further support the flue. A rafter/roof support is normally used in this situation prior to it passing through the roof.
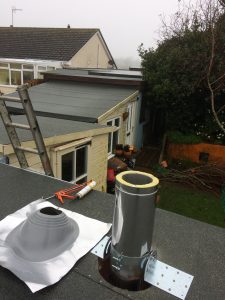
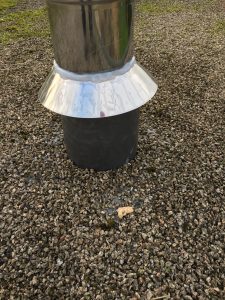
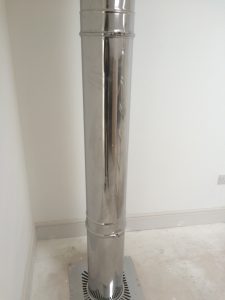
As the flue penetrates the roof, a flashing kit will be installed around the flue and this will be made watertight depending on your roof structure. If you have tiles or slate, these will be tiled around it. We tend to use a lead flashing coupled with a storm collar in this instance as it looks and performs well. If you have a flat roof, then the flashing and products used to waterproof this will vary accordingly.