Solid fuel appliances
The official terminology for a wood burner, room heater, stove, log burner, mulit–fuel burner or multifuel stove is a Solid Fuel Appliance.
As the name implies you should only use them to burn solid fuels.
Some solid fuel appliances are designed specifically to heat up a boiler and provide hot water to your house.
Others simply provide heat.
In any case, they look good and if installed correctly, you get to have a safe and real fire in your home or property!
Can you provide stoves?
Yes, we can supply about 99% of all stoves on the market. We try and price match where possible but sometimes it just can’t be done. If you do buy from us, the benefit is that if there is a problem with the stove, we’ll take the hit and sort it out with no added fees. We’ll also take responsibility for the delivery and turn up on the day with the stove. If you supply it, you must ensure that you have checked it over before the installation so that it is ready to install and we don’t have to charge for time lost in labour.
Fit for purpose
The stove you choose has to be fit for its purpose.
- It should be suitable and specific for your actual heating needs
- It should physically fit the limitations of your fireplace, flue and structure of your building
- It needs to be made well and withstand the brutality of actually doing its job
- It should perform well so that
- you get as much heat from your fuel as possible
- air quality is optimised
If we install a stove it must be:
- CE marked. Being “Certified European” means that your stove is made whilst conforming to some basic standards. Most manufacturers’ can self certify their stoves with a CE mark.
- Kite-marked with the standard BSEN 13240 (BS 13240/EN 13240). This British or European standard ensures that your stove has been tested in a recognised laboratory and that the minimum gross efficiency of your stove is 65%. Net efficiencies are higher. Some really cheap stoves you can find on the internet may have a net efficiency of 70% but this equates to less than 65% gross efficiency. Naughty! Any stove that has been tested and the efficiency is under 65% will not be marked BSEN 13240. Most installers would not go near a stove without this registration as if anything untoward occurs the emphasis is on the installer. Even with this standard if we are dubious about a stove we will not install it.
Typical efficiency of a stove is in the high 70’s/early ’80s. An open fire burning wood has been tested to be 37% efficient. That means that 63% of the heat generated from that log is going up the chimney and NOT into your room!
If you cannot get any information from the manufacturer readily – such as the thickness, how it is constructed, if it is BSEN 13240 marked – we advise that it’s left well alone.
SIA EcoDesign Ready
“The Future Has Arrived. The stoves of tomorrow are available today.”
The new legislation that came into effect in January 2022 requires all new stoves to be extremely efficient and environmentally friendly with low CO2 & particle emissions – these stoves will be EcoDesign Ready. This link will also direct you to a large number of stoves that are compliant to this standard.
We are able to install a stove that is not Eco compliant provided that it has already been manufactured and is already on the market for sale.
Particle emissions have had bad press lately and rightly so. These are damaging to air quality and are released from burning wood that should not be burnt as it’s too wet or “green“. Older style stoves don’t have the technology for clean burning in that they aren’t that efficient so these also need to be phased out to make way for the stoves of tomorrow!
The SIA stands for the Stoves Industry Alliance. Its members are about 40 strong and are mostly leading manufacturers in the stove industry.
Simply by choosing an “SIA ecodesign ready” stove and burning the correct fuel, you’ll help to improve the air quality.
Determining the correct heat output (KW output)
Stoves produce heat and the amount of heat a stove can generate is measured in Kilowatts (KW). The stove can be tested to measure 2 heat outputs: its average heat output and its effective heat range. It is important to take these factors into consideration when determining the right stove for you.
During the site survey, we will determine the desired KW output you would require for your particular needs. The cubic volume of your room, how much heat you like, the position of your house, its age and how well it is insulated are all taken into consideration to give you an accurate average heat output value. Each stove will have varying ranges of heat and this is also important as you don’t want a stove that isn’t going to give you adequate heat – you would end up overheating the stove to get the heat you need from it and over time this can damage the stove and flue. Having a stove that produces too much heat for your needs will be uncomfortable and you’ll likely use it incorrectly; producing heat at a lower Kw than it is designed for. This will cause other problems. For example, the waste products and gasses won’t be dispelled from your flue which could result in Carbon Monoxide poisoning and tar deposits on the flue.
Consequently getting the right heat output of a stove is important.
Do I need additional ventilation?
The basic rule of thumb is that if your stove:
A) has a higher average KW output above 5Kw (i.e. 5.1 KW and above)
B) is installed into a new build (built after 2008) – regardless of the KW output
– then additional permanent air ventilation is required to be fitted. This is because the stove will likely require an additional air supply to allow the fuel to combust correctly. Without this extra air supply, the stove might struggle and you could notice smoke coming into the room from the stove/air vents.
Air bricks or air vents will need installing ideally in close proximity to the stove.
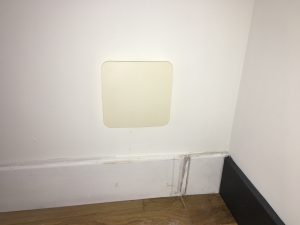
Some stoves can be fitted with a direct external air supply feed into them. These are ideal for new builds whereby the property will be pressure tested. The air supply comes in a kit form. It normally includes a flexible aluminium hose that connects the stove to the through-wall vent tube. Clips to hold the tube in position on the stove and on the wall vent are included. An external cover/louvre/grill is included too.
Some air vents are designed to reduce the sound of air but without reducing the amount of air. There is a calculation we use that determines the size of the vent but is typically no bigger than the size of a saucer – only square.
How much air gap should I have around my stove?
If a stove is installed into a fireplace, it must have an air gap surrounding it to allow for air to circulate around it and provide adequate air for combustion. The minimum amount of air is dictated by the manufacturer. Generally speaking the larger the air gap the better it will perform. We don’t like to squash a stove into a fireplace. The air gap is referred to as the distance to “non-combustible material”. Typically it may be as little as 50mm as the rear of the stove and 100mm to each side of it. If we can we like to increase these distances. The only exception to this rule is when an “inset” stove is installed which is designed to fit snuggly into the fireplace.
Inset or free-standing stove?
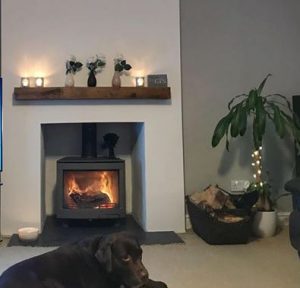
Inset stoves are designed to fit into your existing fireplace with minimum disturbance. They taper inwards at the back so that they fit into the existing fireback of your open fire. Sometimes the throat is angled so that the flue can be attached more easily. This type of stove is sometimes bolted into the fireplace and at other times not as they are weighted at the back to prevent movement. When allowed by the manufacturer, we tend to backfill the stoves with insulation so that heat transfer is directed into the room and not lost up the chimney.
One benefit of installing an inset is that it is one way of installing a stove with minimal disturbance and without the additional expense of remedial work.
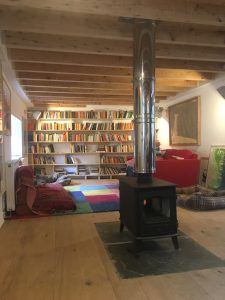
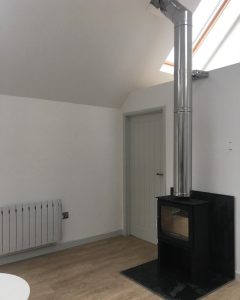
Free-standing stoves can be installed within fireplaces or on a separate hearth. These stoves can be used for both flexible liner and rigid twin wall flue systems. They require air gaps surrounding them to allow for adequate combustion. Some have an option of legs and log stores fitted under them.


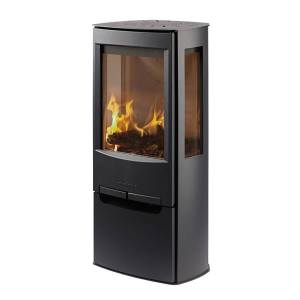
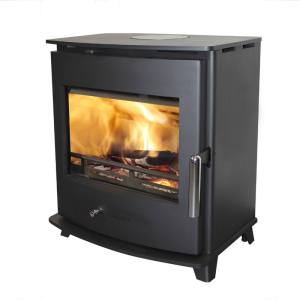
Contemporary, modern or traditional stove?
You will need to decide what style of stove you like. An old worldly traditional stove with tracery on the glass and a double door, a contemporary cylindrical tall stove with a log store or a modern simple clean cut cube-like stove? The choices and combinations are all out there…

Wood burner or multi-fuel stove?
It’s all about personal preference – but we would advise you to choose a wood burner over a multi-fuel burner every day of the week. Why? Because it can be easier, cheaper and greener! Read on…
The simple difference is that as the name implies wood burners are solely for burning wood on. With a multi-fuel stove, you can burn both wood and smokeless fuels.
When you start introducing two choices of fuel, things can get a bit complicated. The basic rule is never to have both fuels burning at the same time. If you are going to change fuel during a fire, always transition from one to the other when the fuel looks like charcoal. Smokeless fuel releases sulphuric acid and wood releases water. Combine these fuels and the resulting product can corrode your liner. It also can damage your stove.
Having swept flues and serviced stoves countless times, we always prefer to see stoves that are solely wood burners. The systems seem “cleaner” and generally has far less soot and ash present. This also depends largely on what fuel you actually use and how you burn that fuel.
Poor quality smokeless fuels and green logs are just bad news. Don’t use them!
What are the other differences between a wood burner and multi-fuel stove?
Other differences between the 2 stoves include:
- An additional ventilation control: Did you know that wood burns from above and coal and smokeless fuel burn from below? Because wood burns from above, both types of the stove will have an air vent that introduces air from above the fuel. However multi-fuel stoves will have an additional air vent. This is used to direct airflow underneath the fuel.
- You may need to clean your stove more frequently: If you are lighting your fire with smokeless fuel you will need to spend more time prepping your fire. As stated above, smokeless fuel burns from underneath, therefore, you will need to ensure that the fuel bed is free from ash and other remnants of previous fires so that it does not interfere with the air flow. This means that your stove may have 2 extra features: A riddling mechanism and an ash pan.
The riddling mechanism incorporates a riddling arm/lever that controls the riddling plate. The arm moves the grated riddling plate back and forth disturbing the ash so that it can drop into the ash pan below. That’s the idea anyway! Most likely you’ll have to get involved and remove the extra debris yourself.
The ash pan is sometimes incorporated into a wood burner. Usually, it’s not. Wood likes to burn on a bed of ash – anything from 1cm to 1 inch is recommended. So upon firing up your stove, you can just place your kindling and logs on the ash and burn away without having to prep and clean your stove.
Useless fact: A multifuel stove is taller than a wood-burning stove in the same model because of the riddling grate and ash pan.
- Multi-fuel stoves are normally more expensive to install: Primarily because they have the additional multi-fuel kit – i.e. the extra air vent, riddling mechanism and ash pan. This price can vary between models from manufacturer to manufacturer but is typically in the region of £50-£100. However, sometimes this can around £200 more! It’s not always the case though as some manufacturers simply don’t give an option and sell both wood burners and multi-fuel burners as the same model.
It is also recommended that your flexible flue liner be upgraded. Smokeless fuel burns/combusts at a higher temperature to wood – it gives off more heat. This is good for your room but not good for your flue. The extra temperature generated by smokeless fuels simply means that we recommend you upgrade your liner to the type that can withstand the higher temperatures. There’s a lot more information on this in the flexible flue liner section but it means that you could spend another £90 – £280 extra on the recommended upgraded liner.
- Wood burners are greener: Wood is considered carbon neutral; it releases the same amount of CO2 whether it is left to rot in the ground or whether you choose to burn it. Either way, the impact on the environment is the same – the impact on your room is warmer J. However coal and smokeless fuel give off more CO2 and other waste products when combusted. I expect that Greenpeace would be happy with that!
Cast iron or steel log burner?
Your multi-fuel stove or log burner will either be made of cast iron or stainless steel or a combination of both materials. Typically the fittings will be made from stainless steel for durability and the belly will be made from cast iron.
Cast iron takes longer to heat but retains the heat for longer. Stainless steel has the advantage of heating up quickly – but then it loses heat fast once the fire is out.
Some manufacturers state that cast iron transfers heat slowly which makes it well suited to changing temperatures. It also distributes the heat better – which is more noticeable when you are closer to it than a steel version as it will be a more comfortable heat.
I personally would recommend a cast iron stove if you are going to use it regularly night after night. My thoughts are that it will take longer to heat up but once heated it will remain hot for longer. Therefore you won’t be using as much fuel to keep the temperature up and it will better withstand the prolonged period of high temperatures it is exposed to when burning for long periods of time.
Incorrect use with either steel or cast iron stoves can also do varying damage to these materials. For example, having your wood burning fire too hot can cause the steel to warp excessively and the cast iron to crack. That is another reason for ensuring the right heat output of woodburner or multifuel appliance which we can advise on.
Deciding on a manufacturer you like
There are many manufacturers producing many stoves. Each manufacturer typically produces a range of stoves that cover contemporary, traditional and modern stoves. Within each range, there will be stoves produced that vary in KW output
Here’s a list of just some manufacturers:
Aga, Amesti, Arada, Be Modern, Bronpi, Broseley, Caminos, Charnwood, Charlton and Jenrick, Chesneys, Clean Burn, Clearview, Dovre, Dunsley Heat, Esse, Euroheat, Eurostove, Franco-Belge, Gazco, Harrie Leenders, Heat Design, Hunter, Jetmaster, Jotul, Mendip, Morso, Nibe, Nordica, Panadero, Parkray, Pevex, Piazetta, Pyroclassic, Rais, Rofer & Rodi, Salamander, Saltfire, Stovax, Termatech, Town and Country, Villager, Waterford Stanley, Woodwarm, Yeoman.
Our favourite stoves
We have our favourites based on their appearance, originality, ease of installation, value for money and performance.
From a pure installation point of view, we love any stove that meets the following criteria:
- DEFRA approved
- 5″ outlet (or less)
- Top and rear flue access
Ticking all the boxes above will normally mean that we can install a flue with a 5″ diameter. This significantly improves the chances of allowing a liner to be fitted (what are the benefits of a liner?).
Our best budget stoves:
Ecosy+ Panoramic – fantastic viewing window and EcoDesign Ready
Ecosy+ Hampton – a smaller stove for the smaller fireplaces. Also EcoDesign Ready.
For small fireplaces:
Salamander Hobbit SE – A small stove with a big punch. Fantastic for small fireplaces such as Victorian fireplaces when you want to keep the full fireplace surround.
Our favourite British manufacturer:
ACR – Produced in Birmingham. Extremely well made. A fantastic company. All their stoves are EcoDesign Ready, DEFRA and mostly 5″ flue outlets.
Take a look at the Rowandale for a modern take on a traditional stove.
Also, be sure to check out all the Neo range, such as the Neo3P, Neo3F, Neo3W, and the Neo3C for 3 sided glass stoves (The Neo1 range are all single glass sides).
Our favourite European manufacturer:
Contura – Pure Swedish. Quality stoves. Phenomenal company ethics. All their stoves are EcoDesign Ready. Some stoves feature soapstone or sandstone cladding for increased heat retention.
The 51L looks great in most fireplaces. The 810L will fit a larger fireplace. Consider the 330G and the 586 Style for a freestanding space.
Independent Cornish stove:
The Hotpod leads hands down. In fact, there is nothing quite like this stove. Produced by Dan and his team in a workshop in Hayle. There are two versions – the Limited and the Unlimited.
Our favourite stoves:
We love the Scan 66 series, and the Dru Odin series – especially the Odin Tunnel Fixed for a double-sided, gravity-defying circular masterpiece!
DEFRA approved stoves
The great thing about most of the stoves listed above is that they are DEFRA approved and the manufacturer allows us to drop a 5” liner down your chimney which is our “get out of jail card”. Without the manufacturers, approval on their DEFRA approved stoves we can only use liners that are a minimum of 6” in diameter. This can result in us aborting a job as the liner simply won’t fit in your chimney – although we’ve never had to do this yet. The size of the flue may be sufficient but it may have a couple of nasty kinks that the liner will struggle to get past or be partially blocked with stonework that the brushes can’t shift. In some instances, we’ve had to open up the chimney to gain access to the blocked flue in order to allow the liner to pass.
A DEFRA approved stove is considered a “smokeless” appliance. This means that it has been modified so that as the stove combusts the fuel it will “smoke less” than an ordinary non-DEFRA approved version. Typically the air vent can never be completely closed off thereby increasing the airflow and preventing the fuel from slumbering. This is proven to be far better for the environment.
DEFRA approved appliances HAVE to be installed in smoke controlled areas which are typically big cities or areas prone to over pollution of the air.
Following on from London’s Great Smog of 1952, the Clean Air Act was passed in 1956 in order to reduce air pollution. From this, smoke controlled areas were introduced. Your local authority will be able to inform you whether you live in a smoke controlled area.
Click on this link for more details:
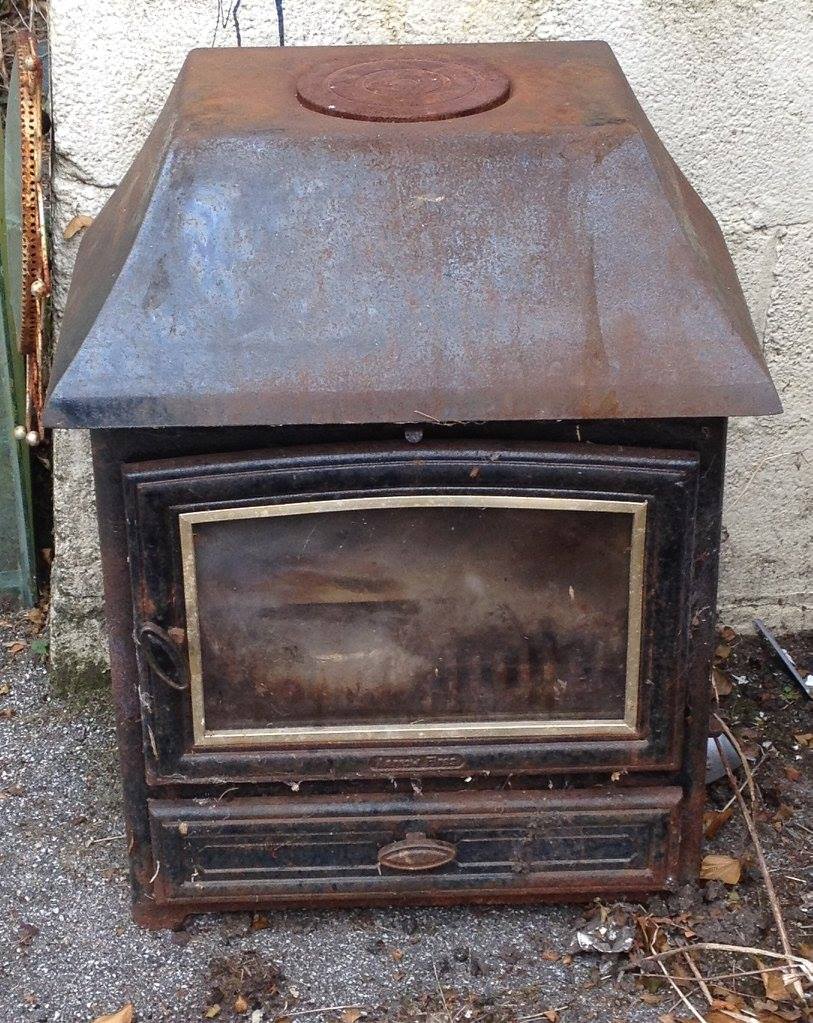
Second-hand stoves
As with any stove we install it needs to be CE marked and comply with BSEN 13240 which can be found by contacting the manufacturer. More importantly with second-hand stoves, they need to be in good working order, have an installation manual and a user guide. You should also note that the older versions won’t be that efficient so quite simply in the space of one winter, you might end up spending over £100.00 on extra logs and fuel.
One thing to bear in mind with a second-hand stove is that it is very likely to have surpassed its sell-by date and as such will be in need of some TLC.
Although a second-hand stove might seem a good money-saving option, it may cost more in the long run; it will need to be thoroughly cleaned and “de-creosoted” and any rust removed; the seals need to be secure and may need replacing; the fittings working as they should do; the baffle plate and firebricks may need replacing if warped and cracked. Additionally, an older stove may cost you more in the long run as some new burners have an amazing efficiency rate – just like new cars can save you fuel costs, so can new burners!
Before we install your second-hand stove we will seal it and light a smoke pellet to see if there are any leaks. If we aren’t happy with it, we won’t install it.
Unless agreed we would expect your second-hand stove to be in good working order and fit for purpose prior to installing it.
If you’re not sure what you are doing we can offer a full service to your second-hand stove. Prices will vary depending on what is required.
How soon can I light the stove after it is installed?
You normally have to wait 24 hours before you first light the stove. This is because we have used various products to seal and fix your flue and these need time to cure before the first lighting. For example, the heatproof silicone may liquefy if not allowed time to dry and set.
You should also be aware that heatproof paint cures once the fire reaches a certain temperature. This applies to a new stove and on some products that we use. This means that you are likely to experience smoke in your room which will come from the paint as it dries. This is normal for the first firing and in some cases the first few firings depending on how hot you get your stove. The amount of smoke produced varies from one stove to another but can be a substantial amount to cause concern if you are not aware of this. The CO alarm will not trigger but other smoke alarms will be activated. You should close the door and open the windows to air the room. Once cured this process is complete.
How do I control my fire?
Air vents are predominantly used to control your fire. There are usually two. One is referred to as the primary vent and the other the secondary vent. Some burners may have a third or tertiary control/vent.
The primary vent is the main air ventilation that feeds the fire. It may come from above the fire in a wood burner or from underneath the fire in a multi-fuel stove. This is because wood burns best when fed air from above and coal from underneath (that’s why its best to leave ash on the fire bed when lighting your fire with wood and to clean the fire bed when using smokeless fuels). The secondary vent is typically used for “clean-burning”. This means that the gasses produced from combustion are burnt – releasing more heat and providing a safer burn ensuring the amount of gasses released into the atmosphere are kept to a minimum. The secondary vent is typically directed over the glass from inside the stove thereby helping to maintain a clean and clear view of the glass. Very clever!
Some stoves even have ventilation systems whereby they introduce hot air over the fuel so that it creates an even more efficient burn and releasing more heat. This is referred to as tertiary air ventilation. Very very clever!
It gets better – some stoves now have remote controls! Sit back, check out the app on your phone and see how efficient your stove is working. It will control the ventilation for you ensuring you get the most out of your fuel and you maximise the heat from it.
You should always refer to the manufacturer’s guidelines on controlling your fire – but click here for more information.
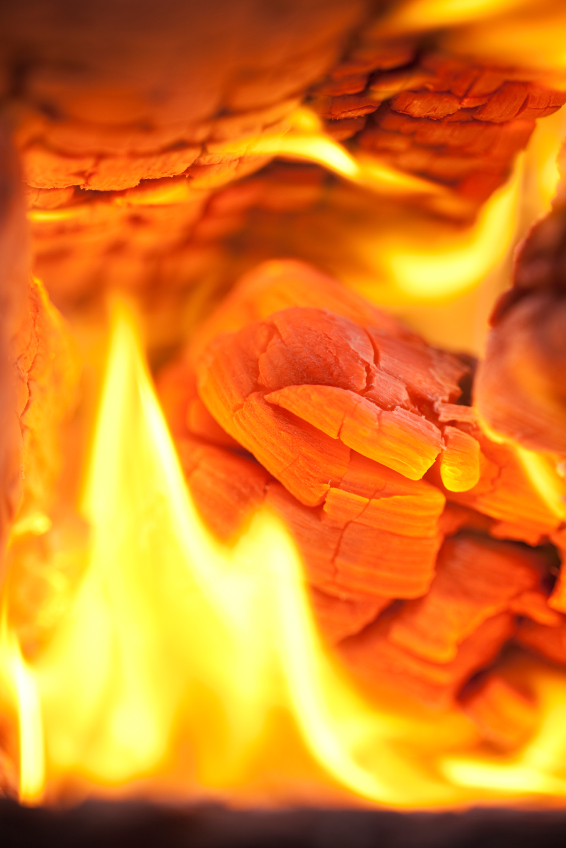
How do I light my log-fire?
If you’re burning logs, then it’s a good idea to start on a bed of ash from your previous fire which should be about 1cm to 1” thick. Tightly crumple several pieces of newspaper and put these down to cover the bottom of your stove. Alternatively, break a firelighter into a few small pieces. Now place small pieces of dry kindling on top of the paper/firelighters; use lots and place them crisscrossed over the paper or firelighters. This will allow air to move through it for combustion.
Before lighting it up – make sure your vents are all open. Now set fire to all the firelighters/the newspaper in several places.
You should be able to add a small log or two on top of the kindling depending on how big your firebox is.
You need to take care that you don’t ever push or squeeze the wood into the stove as you may damage the delicate vermiculite bricks that are there to protect the body of the stove from being exposed to the heat and warping.
You may want to slightly open the door to get more air into the stove fuelling the fire. Once the kindling is well alight close the door.
You are attempting to get the logs alight with a glowing flame at the edges. If you keep your vents open this will quickly occur. Once you have achieved this, you should start decreasing the vents and limiting the amount of air into the fire. You are aiming to have several small lazy flames coming from the logs. Once your kindling is reduced to glowing embers your wood will bed down onto them allowing the logs to burn in several places.
If you think the flames are becoming too lazy and are getting small, then you will need to introduce more air. Contrary if you feel that the flames are going crazy and there is a good draft to be heard from the vents/fire, then you are over-firing the stove and you need to reduce the airflow in order to subside your fire.
The goal with a wood stove is to maintain a relatively low-medium sized lazy flame whilst burning the logs. You do not want to let the flame go out as this will lead to poor combustion as the volatile gasses released from wood will not be combusted. Always maintain a flame.
There may be two vents on a wood burner. The primary vent is the one you should close first whilst the secondary vent is used to control the fire and keep your glass clean.
Ideally, you need to end up with a bed of glowing red embers before you add more wood. You should consult your stove manufacturers’ handbook for the wood reloading rate: This is the rate at which you add your wood so that your stove can burn at its most efficient rate – saving you cash and ensuring your flue and stove are working correctly. Before adding new logs, open the vents and then open the door slightly – just for a few seconds. This creates a draught that takes the poisonous gasses up the flue – instead of into your room! From the start to getting to the reloading stage takes about 30-40 minutes.
How do I light my multifuel fire?
Unlike logs, you need to ensure that the firebox is clear of ash and debris from your previous fire as you want to allow as much air as possible to feed up between your multifuel briquettes.
You can choose to use firelighters or newspaper as with log fires. However, you’re likely going to need more firelighters. Once again place small pieces of dry kindling on top of the paper/firelighters; use lots and place them crisscrossed over the paper or firelighters to allow air to move through it for combustion. Gently place individual briquettes over the kindling taking care not to overcrowd the firebox. The aim is to get air moving up and between the briquettes.
Before lighting it up – make sure your vents are all open. Now set fire to all the firelighters/the newspaper in several places.
You may want to slightly open the door to get more air into the stove fuelling the fire. Once the kindling is well alight close the door.
You are attempting to get the briquettes alight with a glowing flame at the edges. If you keep your vents open this will quickly occur. Once you have achieved this, you should start decreasing the vents and limiting the amount of air into the fire. You are aiming to have several small lazy flames coming from the briquettes. Once your kindling is reduced to glowing embers your briquettes will bed down onto them.
If you think the flames are becoming too lazy and are getting small, then you will need to introduce more air. Contrary if you feel that the flames are going crazy and there is a good draft to be heard from the vents/fire, then you are over-firing the stove and you need to reduce the airflow in order to subside your fire.
The goal with multifuel is similar to burning wood – to maintain a relatively low-medium sized lazy flame.
There may be up to three vents on a multifuel burner. The primary vent is the one you should close last as this controls the amount of air being introduced from under the fuel.
Ideally, you need to end up with a bed of glowing red embers before you add more multifuel. You should consult your stove manufacturers’ handbook for the reloading rate: This is the rate at which you add your fuel so that your stove can burn at its most efficient rate – saving you cash and ensuring your flue and stove are working correctly. Before adding new fuel, open the vents and then open the door slightly – just for a few seconds. This creates a draught that takes the poisonous gasses up the flue – instead of into your room! From the start to getting to the reloading stage takes about 30-40 minutes.
You should never burn wood and multifuel together at the same time as the acid produced from the multifuel mixes with the water from the wood and together produce creosote which can damage the flue.
This link is another useful reference for lighting a fire.